
How to Grow and Expand a Facebook Group
Mark Zuckerberg has officially announced that Facebook community is 2 billion people; more than 1 billion people use Facebook groups each month.
Did you know creating a group in Facebook is free; you can create it on your own. It will serve you to reach a community or market of specific population.
You could have complete control over your audience and people interacting with your brand or product. You can also use a group to gain more confidence within your audience; solving their needs.
I will show you how easy is to create a group; giving you a start point to grow a successful group and use it to market your business or product.
Once you get to the end, you will be more proficient at a Facebook Group than most marketers.
Enough with the intro, let’s begin.
Who is your group going to be focused or targeted to?
If you want to focus your group to attract leads, then you should target ideal potential customers interested on what your business has to offer.
Let’s say we have a catering business, who wants to get leads on business events or weddings. Your group should provide valuable tips on menu choices, how a perfect menu can make a perfect event.
Just think of whose needs or problem you want to solve, then you will be able to better target your audience. Once the members in your group realize how they benefit from the group, new members will start joining.
The benefit of having content that is helpful, is to increase your group with ideal and potential customers instead of just anyone.
Let’s pause for a second and think of a group we would like to create, how about “pets lost and found”.
Now, let’s think as a Facebook user, which group would you prefer to join? One that is called “pets” or “pets lost and found”?
You most likely chose the second one, which is the more specific to what your group is planning to solve. According to American Humane Association, there is an estimate of over 10 million dogs lost or stolen every year.
A lot of people know that Is not easy to lose a pet, so people will join the group to get help or help others. Being precise on creating the group will make those people find it. Just so you know, there are 2 billion searches a day in Facebook. The group should create a great impact is grown properly.
With a proper name for your group, it will be easier for people to find.
Let’s create a group mentioned above and see how it’s done.
Steps to create a Facebook group
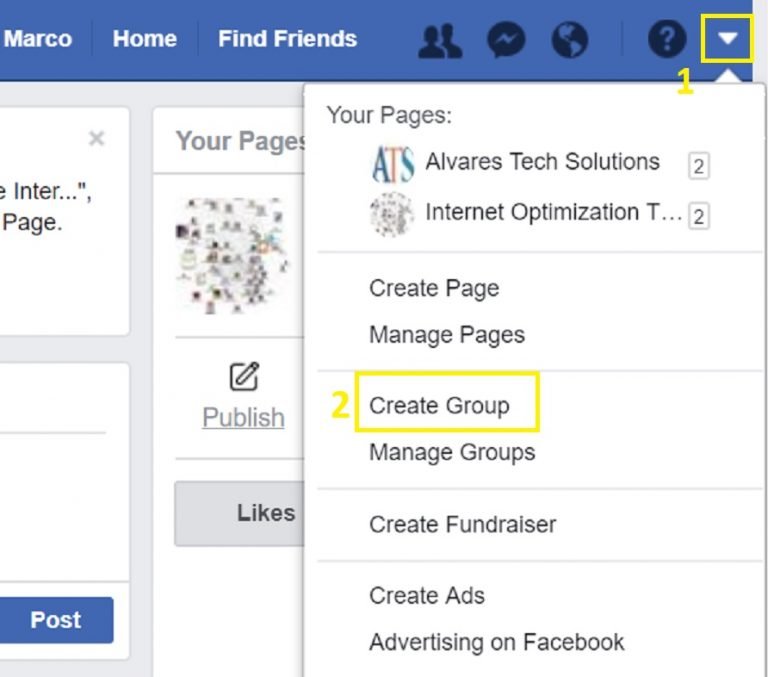
Go ahead and log in to Facebook and see image below, 1) Click the “Drop Down Arrow”, 2) Click “Create Group”.
Now the following part is where the group name matters.
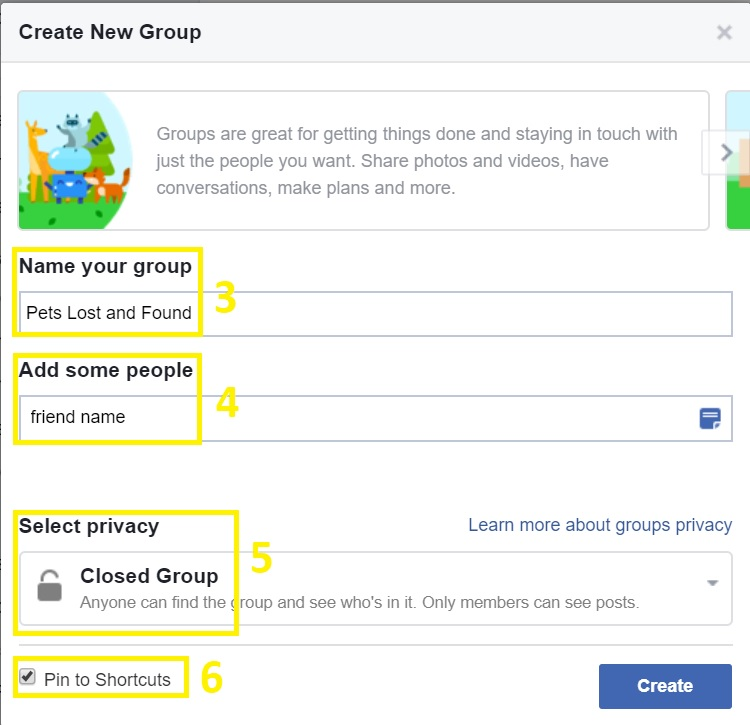
Follow the following steps using the image below as a reference.
- 3) Name your group, in this example “Pets Lost and Found”
- 4) Add some people, you could add an employee or person that you already have as friends.
- 5) Select privacy, choose Closed Group for the following reasons:
- You do not want your group to get spammed, June 2017 the statistics showed 32 billion daily active users. In those numbers, there are lots of spammers that could harm your groups integrity.
- Another reason is to make your group exclusive giving people a reason to join and wanting to see your content.
- You will be able to screen people before their request is approved to join, gives you the option to screen them and keeping a high-quality group.
- 6) Pin to shortcuts, selecting this will put a shortcut in the left sidebar of your Facebook profile, in order to find it easier.
Click the “Create” button.
Now is time to select an icon for your group, for this example I will use something related to the name as shown in the image below.
Click on “OK” button. Your group will be created and more options become available to keep perfecting your Facebook group.
Let’s find the section shown in the image below, it is located on the right-hand side of your group.
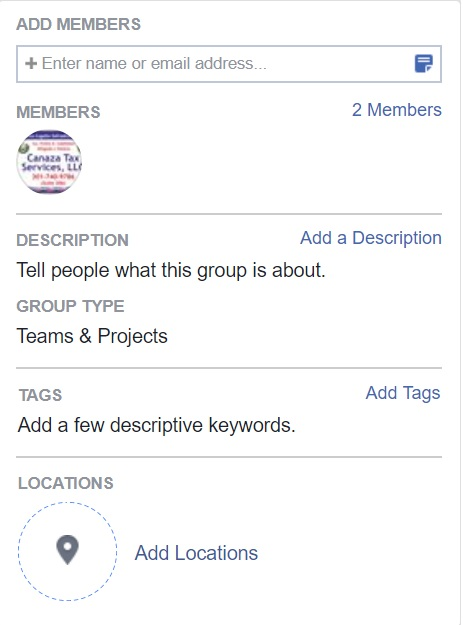
Once you find the section, click on “Add a Description” and think on one that will convince people to join. This is viewed by anyone in Facebook, even people that have not joined yet.
I thought of something like this.
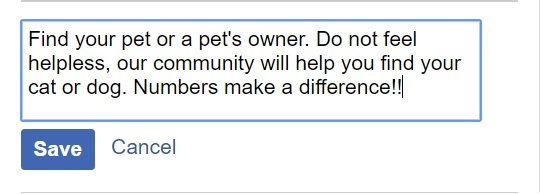
Click on “Save” and let’s move on to tags.
Select “Add Tags”, you have up to 5 tags to help people find your group. This is what I put on my example.
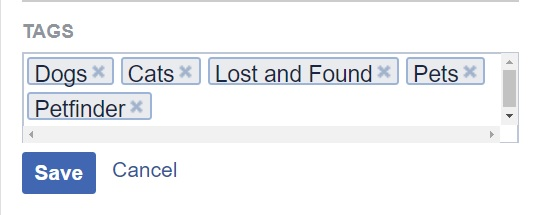
Click on “Save”, now let’s move on to change the group image.
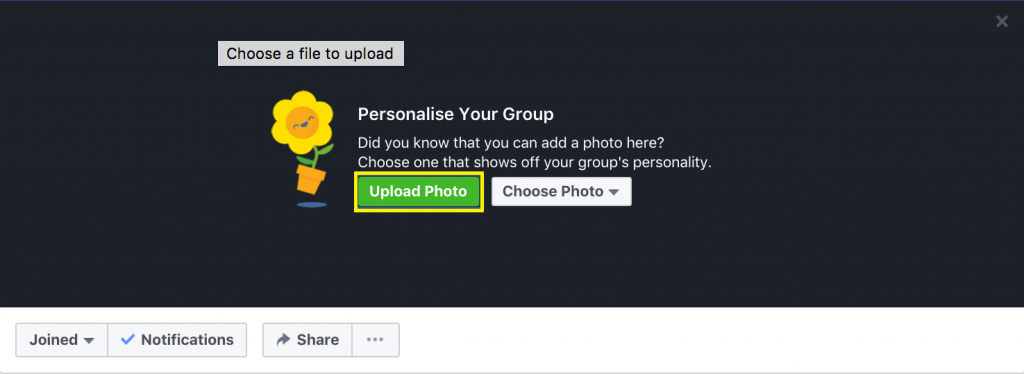
The “Cover Photo” should be an image that matches your group, search an awesome image related to your group description.
Once you have the awesome picture, press on “Upload Photo” button. Find and select the photo you saved before.
The image will be upload it and displayed on the top of your group, before you click on “Save Changes” you get the option to move the picture around to better position it.
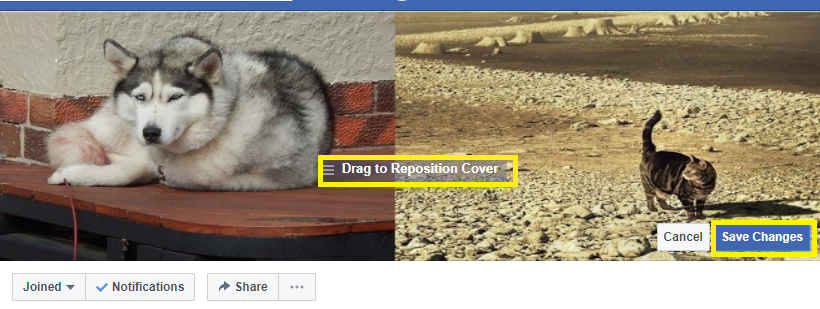
Yessss!! We just created and set up a group.
Now let us further improve your group, these improvements will enable more people to find your group when they search in Facebook.
Open the “Edit Group Settings” by 1. Locating the “thee dots” under the cover picture, next to Share. 2. Click on “Edit Group Settings”.
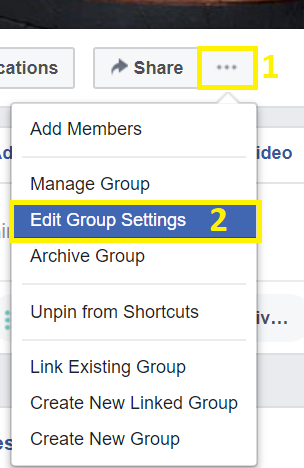
The following window will open, we will cover the highlighted parts; Group Type, Locations, Membership Requests.
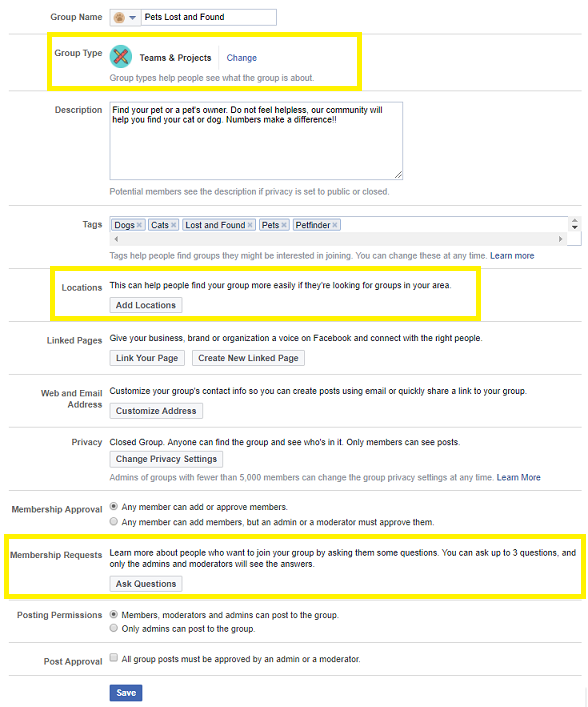
Click on “Change” in the Group Type section. Then select a group type that resembles your group, then click on “Confirm”.
I selected “Custom” because there was nothing else related to my group.
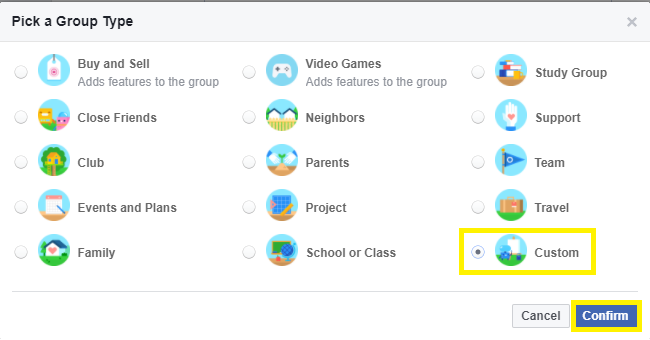
Click on “Confirm” to save.
The following is the “Locations” section, in your case you have to add your area or coverage locations. I am going to select “United States”, since I don’t have a specific location for this group. You can add more than one location, but do not over do it.
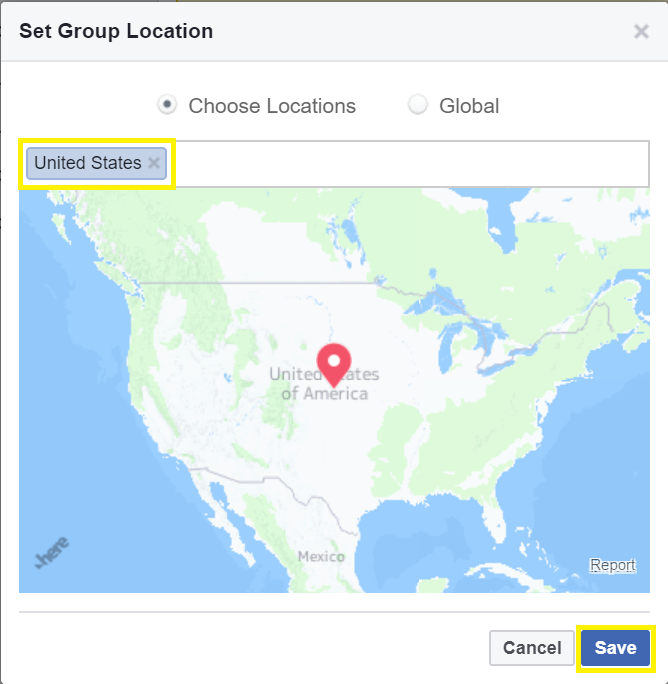
Click on “Save”.
The “Membership Requests” settings are a way to learn about people that try to join your group, asking questions allows you to decide if the person requesting would be a good fit for your group and business.
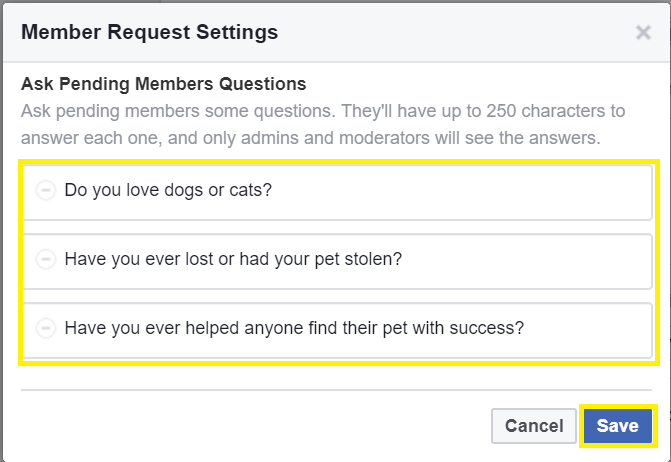
Click on “Save”.
Alright!! We finished setting up the group, now further instructions to grow a group.
Let’s get started.
The need to Create a Facebook Page for your group
A group is private and only the members in it can see the content and take action on them.
So, a page for the group will allow to promote a group with ads and public posts.
A Facebook page enables businesses and organizations to create an authentic presence on Facebook. Unlike a profile or a group, Facebook pages are visible to everyone by default.
With a Facebook page you can promote your group with ads, allows you to promote to the public in Facebook.
Let’s learn how to set up a page, is almost the same way you created a group. Find the drop-down arrow and instead of clicking on Create Group, click on “Create Page”.
You will get the option to select which type of page you are creating. In this example I will choose “Cause and Community”, in your case you might select “Local business or place” or “Company, Organization or Institution”.

Click on “Get Started”.
Same as the group, the cover photo makes a difference.
You can also upload a short video as a cover image. Make sure it is related to the people you are trying to reach and business you are promoting.
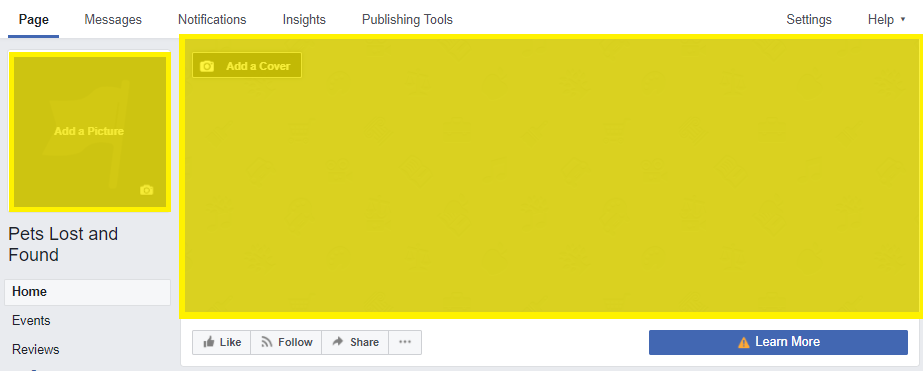
The images could be the same as the one in the group, it shows relation to each other.
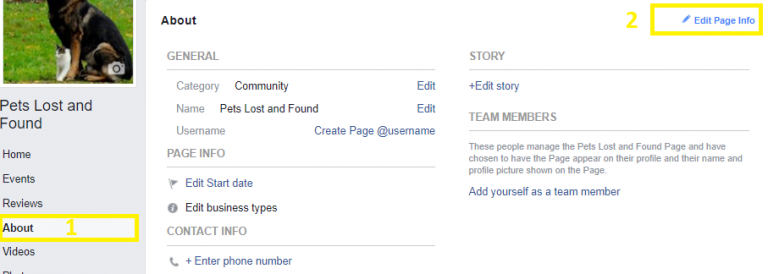
After choosing good images, additional settings have to be configured to make it better. 1) Click on “About” on the left-hand side of the page. 2) Click on “Edit Page Info” on the right-hand side under the cover image.
Now the “Categories” and the “Description” setting need to be populated, always think of related content to your public.
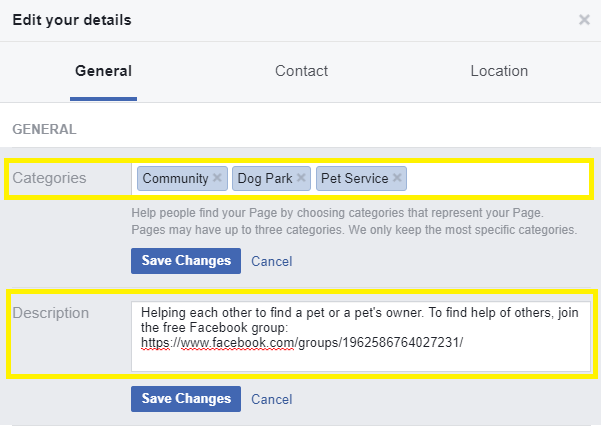
Ensure you click on “Save Changes” after every setting.
Great! Now that details are taken care of.
Let’s create our “first post”, then “pinned” so visitors can see it on top. Then promote it by sharing to your Group.
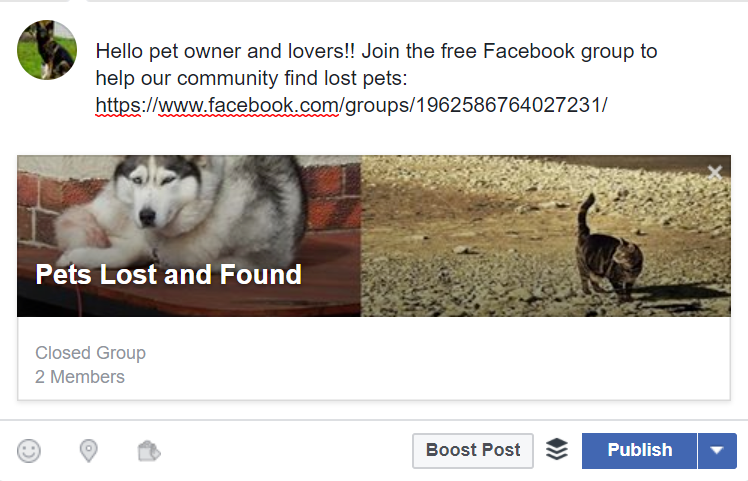
Write a post that will attract the public, something like the example below. Ensure you copy your group website address into the content.
Click “Publish”, now find that post and look for the arrow on the top right-hand corner like in the image. Once you click on it, pick “Pin to top of page” option.
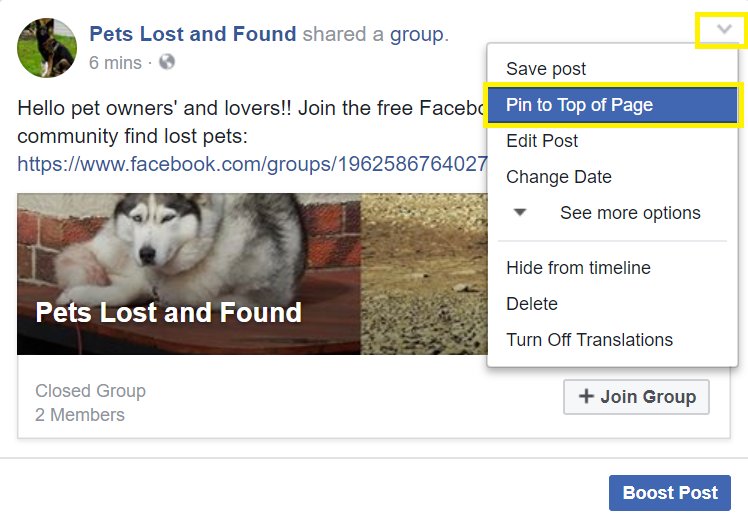
The reason for a “pinned post”, is to keep the post at the top of your Facebook page. When the public visits your page, the post will remain on top even if other posts created at a later time.
Now you have to decide which method of growth you want to use, on this guide I will tell you about the FREE method.
There will be another guide for the PAID method, which I will post once it is done.
** The two options are Facebook paid ads and without advertising. **
Facebook growth without advertising
As of June 30, 2017, Facebook stats reported 2.01 billion monthly active users.
We only need to reach a fraction of that number; the FREE way is to mention your group on your Facebook page from time to time.
Be careful not to use your page just to drive traffic to your group, there has to be valuable and interested content for visitors to organically “like” the page.
Do not mention the group on the page so often, it can be overwhelming and make visitors leave. Wait for at least 100 likes before you mention it again.
When you mention the group again, make sure you communicate with your members and new visitors. Do not make it look like spam or overly pushy.
Having valuable content will attract visitors to your page, there will be some that will not want to join your group. That is OK, do not overwhelm them and cause them to un-like the page.
Promoting your group in other Facebook groups
Promoting your group in other related groups is another effective method to grow.
However, some of those groups might have rules against self-promotion, read the rules before joining them. Remember to provide value to the group before you start promoting your group. You will find the rules in the description, or on a pinned post at the top of that group.
Now let’s take a look how to go about it.
On the Facebook search bar, type something related to your group. For the example purposes I will use “lost dogs”. Then click on “Groups” below the search box to view only group results.

Find a group that has at least 1,000 members, if you cannot find one, then try to find one that has at least 500.
If you are just starting, you want a group with not too few or too many people, it would make it hard for them to see your promotions.
Here is an example, I found a group with over 3k people and posted the following.
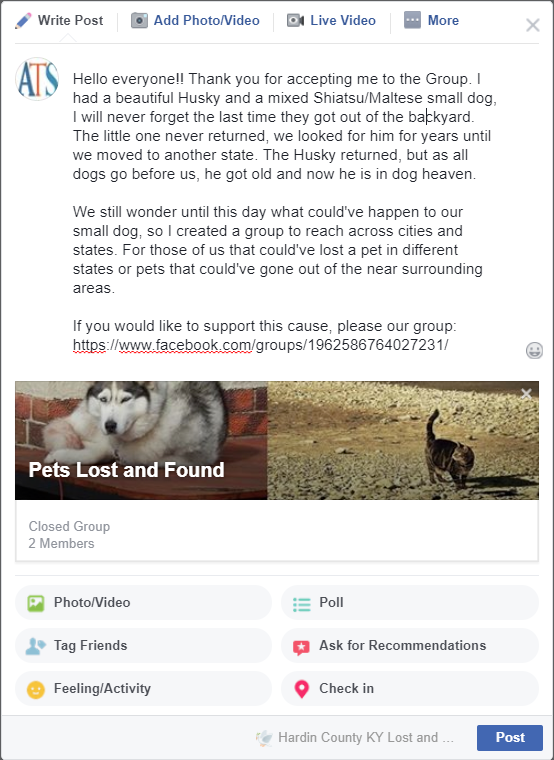
As you can see in the image, I told them my story and then presented my group, no one wants someone that goes into a group and simply tell people to “join my group” that is spam.
You have to give them value and reason why they should join your group.
Another method is to contact the group admin directly and ask them if they would like to link their group to yours and yours to them.
Linked groups appear near the top for all members to find them easier. It is a good way to let members know about relevant groups.
This is how you link groups.
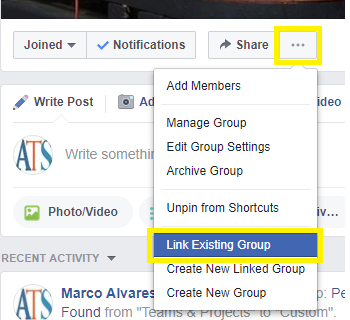
Click on the “three dots” below the cover picture. Select “Link Exisiting Groups”.
Look for the group you desire to link, click the “Link” button to the right of it.

Now you can write a post explaining why the group is relevant to yours. You can see in the image below, I wrote something brief, the window also has a section letting you know the link can be removed at any time, and the last part shows and example of the linked group on top.

Click on “Post” and “Done”, now you are linked to that group. Ensure the group you agreed to link with does the same.
Conclusion
Following this guide will help you grow your group without having to pay a dime, but remember it does take time and effort.
Do not give up, the more you put your page out there, the more views and like it will get.
But the most important part to remember and keep in mind is “VALUABLE” content, the more valuable your content is the more people will want to share with others.
If you believe I could improve this post in any way, please comment and let me know.